Setup ChemoLIMS NX Project In intellij

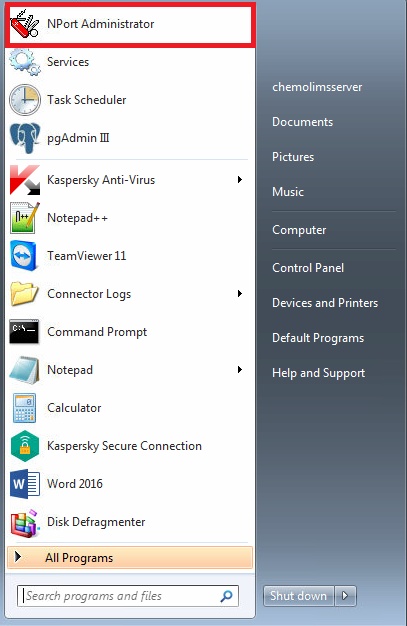
  1. Open intellij software
  2. Click File > Open…
  3. Select gradle under: [your_local_drive]\[your_project_folder]\ [your_chemoNX_folder]\webapps
  4. Once selected, click “OK” and pick “Open as Project”. An Import Project from Gradle screen shall display.
  5. Follow below settings to setup Gradle screen:

    [image_with_text image=’https://docs.chemoinformatics.com/wp-content/uploads/2020/10/1.jpg’ title=” title_color=” title_tag=’h6′]- Gradle JVM: Select Java JDK been using in your desktop/laptop.Click “OK” after settings been selected.

    [/image_with_text]
  6. After finish configuration of project, navigation to the top right and look for below image section.

    [image_with_text image=’https://docs.chemoinformatics.com/wp-content/uploads/2020/10/setup-chemolimsnx-screen2.jpg’ title=” title_color=” title_tag=’h6′]- Under dropdown, select spring-app or the project name just setup.
    – Press “Play” button to run pro[/image_with_text]
  7. After start project, a terminal shall pop up and prompt project running/error log panel, refer below image for the panel.

    [image_with_text image=’https://docs.chemoinformatics.com/wp-content/uploads/2020/10/setup-chemolimsnx-screen3.jpg’ title=” title_color=” title_tag=’h6′]First load of the project may take some time. Once project successful loaded, log panel shall display “Started Webstart in …”, refer below image for the success message:[/image_with_text]

    [image_with_text image=’https://docs.chemoinformatics.com/wp-content/uploads/2020/10/setup-chemolimsnx-screen4.jpg’ title=” title_color=” title_tag=’h6′]- If project unsuccessful to run, check with your senior or supervisor for further action and ensure the settings match.

    [/image_with_text]


Setting Up Nova pHOx Ultra for ChemoDMS

This guide is for configuring the Nova pHOx Ultra analyzer to be used with ChemoDMS.

Nova Service Mode

  1. At the home screen, press SYSTEM.
  2. Press SERVICE.
  3. Press NOVA SERVICE.
  4. Enter the password based on the Ms Excel file from Nova Team.  Password entry is by using the keypad on the screen.
  5. The password depends on the date.  Double check the analyzer’s date if the password fails.
  6. Once password entry is successful, plug in your USB mouse and keyboard.
  7. Press the Windows logo and SWITCH USER.
  8. Select the NovaService user and enter the password provided by Nova Team.


Configuring SQL Server Management Studio

  1. Click on Windows logo -> Programs -> Microsoft SQL Server 2008 R2 -> SQL Server Management Studio
  2. Connect to the server using:-
    Server type:  Database Engine
    Server name:  <ANALYZER_PC_NAME>\NOVA
    Authentication:  Windows Authentication
  3. Click CONNECT.
  4. In the OBJECT EXPLORER pane (left side of the app), right-click on the analyzer name (the first item).
  5. Click PROPERTIES.
  6. In the SERVER PROPERTIES popup, click on CONNECTIONS from the left pane.
  7. Tick ALLOW REMOTE CONNECTIONS TO THIS SERVER.
  8. Go to Security -> Logins
  9. Right-click on Logins.
  10. Click New Login.
  11. General
    …Login name:  chemodms
    …SQL Server authentication Password:  chemodms
    …Untick Enforce password policy
    …Default database:  Nova
    Server Roles
    …Tick public and sysadmin
    …User Mapping
    …Tick Nova
    …User:  chemodms
    …Default Schema:  dbo
    Status -> Settings
    …Permission to connect to database engine:  Grant
    …Login:  Enabled
  12. Click OK.
  13. Click OK and close the SQL Server Management Studio.


Configuring SQL Server Configuration Manager

  1. Click on Windows logo -> Programs -> Microsoft SQL Server 2008 R2 -> Configuration Tools -> SQL Server Configuration Manager
  2. On the left pane, go to SQL Server Configuration Manager (Local) -> SQL Server Network Configuration -> Protocols for NOVA
  3. On the right pane, right click on TCP/IP and click PROPERTIES.
  4. In the TCP/IP Properties, popup, set the following:-
    In the PROTOCOL tab:-
    …Enabled:  Yes
    …Keep Alive:  30000
    …Listen All:  Yes
    In the IP ADDRESSES tab -> IP ALL:-
    …TCP Dynamic Ports:  (Leave this blank)
    …TCP Port:  1433
  5. Click OK.  A warning popup will appear.  Click OK.
  6. On the left pane, SQL Server Configuration Manager (Local) -> SQL Server Services
  7. On the right pane, right-click SQL Server (NOVA).
  8. Click RESTART


Configuring Windows Firewall

  1. Open up Windows Firewall with Advanced Security
  2. In the left pane, right-click on Inbound Rule.
  3. Click on New Rule.
  4. Port -> TCP -> Specific local ports:  1433 -> Allow the connection -> Tick all Profile -> Name:  ChemoDMS


Install and Configure Router DLink N300

  1. Open Internet Browser (for example Firefox, Chrome) and type the URL 192.168.0.1
  2. Click Start
  3. Then select Manual Setup and click Next
  4. Change
    • Internet Connection: Dynamic IP (DHCP)
    • Network Name (SSID): ChemoLIMS
    • Security Mode: Disable Wireless Security
  5. Set the username and password
    • username: admin
    • password: P@ssw0rd
  6. Next, select the time zone to Kuala Lumpur, Singapore
  7. Then click the complete button
  8. The system will log out
  9. Login once again using username and password as in Step 9
  10. Then select the Advanced button at below of the page
  11. On the Status Tab, follow the following settings
  12. After changing all the setting, click the Save Settings button
  13. Then reboot is needed. Select Reboot Now
  14. Then go to Advanced Tab and follow exactly like in the picture
  15. Then Save Setting. Reboot is needed and select Reboot Now

Install and Configure Moxa NPort 5110

  1. Search for NPort Administrator
  2. Then it will show the following screen and click on the Search button.
  3. Make sure the Moxa is power on in order to find the IP Address of the Moxa.
  4. The list of the moxa that is connected will be listed below.
  5. Double click on the moxa that is needed to be configured.
  6. Select the Basic tab and click on the Modify check box.
  7. Change the server name to the analyzer name
  8. Select the Network tab and click on the Modify check box.
  9. Change the IP Address based on Site Configuration
  10. Select the Serial tab and click on the Modify check box.
  11. Then double click on the port to modify.
  12. Then change the setting of Serial Settings exactly as in the picture
  13. Select the Operating Mode tab and click on the Modify check box.
  14. Then double click on the OP Mode to modify.
  15. Then change the setting of Serial Settings exactly as in the picture
  16. Lastly, select the OK button to save all settings that have been changed

Test Configuration for Urinalysis

Discipline

Urinalysis

Instruments

Mission U500, Siemens Clinitek

Test Configuration

Attention: The internal data of table “6” is corrupted!

Test Configuration for Hematology

Discipline

Hematology

Instruments

Sysmex XN1000, Sysmex KX-21, Sysmex KX-21N, Sysmex XP-100, Mindray BC-30S, Nihon Kohden Celltac A

Test Configuration

Attention: The internal data of table “5” is corrupted!


Test Configuration for Biochemistry

Discipline

Biochemistry

Instruments

Beckman Coulter AU480, Roche Cobas C311, Abbott Architect C4000

Test Configuration

Attention: The internal data of table “7” is corrupted!

Install and Configure SATO Barcode Printer

Sato Barcode Printer –  CG4 Series

  1. Follow the instruction as in the CG4 Operator Manual in order to install ribbon and sticker
  2. Make sure two full stickers is fully out from the printer
  3. Install Printer Driver by using USB Cable / Sato Driver CD
  4. Install Sato All-in-One application
  5. Connect the barcode printer with the computer through USB cable
  6. Select Tools > Auto Discover to detect the barcode printer
  7. The software will detect the printer that is connected
  8. Highlight the printer and select the Interface Configuration on the right menu.
  9. Select the LAN Tab on the top menu to do the configuration
  10. IP Address Setting must be select at Manual Setting and then click ‘Set’ Button
  11. Set IP Address, Subnet Mask and Default Gateway and then click ‘Set’ Button
  12. The IP Address can get from the printer
  13. The Subnet Mask and Default Gateway can get from the client pc by open Command Prompt and type ipconfig
  14. Enable RARP Setting and then click ‘Set’ Button
  15. Set the LAN Mode as Protocol for Driver (STATUS4)/ENQ response and then click ‘Set’ Button
  16. Right click on the Barcode Printer
  17. Mouseover to Interface Mode and select RS-232C/LAN/IEEE1284
  18. Next, turn off the printer and close the application.
  19. Remove the USB cable and plug in the network cable from the network port.
  20. Switch On the barcode printer and wait for 1 minute.
  21.  Open Sato All-in-One application and remove the previous printer.
  22. Open Command Prompt and type ping [IP Address]
  23. Select Tools > Auto Discover to detect the barcode printer
  24. The new printer display with ‘Online State: Wait to Receive: No Error”.

Test File

  1. Right click on the barcode printer and select Send SBPL Command
  2. Open command text Barcode Command Text
  3. Copy and paste the command text and then select Send
  4. If the barcode is printing, it is SUCCESS
  5. If the barcode is not printing, please check again starting from step 12

Install and Configure Brother Barcode Printer

Coming soon!

Install and Configure Roche C311

Roche Cobas c311

The cobas c 311 analyzer is a stand alone system that offers consolidated testing from a broad menu of clinical chemistry applications. This analyzer has the capacity for ion-selective electrode (ISE) determination of sodium, potassium, and chloride in serum, plasma, and urine. In addition, measurement of HbA1c levels in whole blood can also be performed, making it a truly flexible analyzer.

Copy Files

  1. There are 3 files need to be copied and replace.
    • License File
    • SMC Files
    • Plugin Files
  2. Firstly, stop all these services.
    • Server Console (only when updating sys-services-config.properties file)
  3. Paste the created license into 5 different folder
    • My Computer > C: > Chemolims > License
    • My Computer > C: > Chemolims > server > minimal > license
    • My Computer > C: > Chemolims > console > license
    • My Computer > C: > Windows > Syswow64 > license
    • My Computer > C: > Windows > System32 > license
  4. Go to My Computer > C: > Chemolims > License and double click on update_license.
  5. Next, open Chemolims > console > bin > plugins
  6. Replace .jar files for the old connector
  7. Paste .jar file for the new connector
  8. Copy the existing .config and .log4j files inside C:/ChemoLIMS/console/bin/plugins
  9. Then, right click on bio-rad-d10-config and select edit with notepad ++.
  10. Make sure to change from bio-rad-d10 to sysmex-xn1000 and then Save.
  11. Then, right click on bio-rad-d10-logj4 and select edit with notepad++.
  12. Make sure to change from bio-rad-d10 to sysmex-xn1000 and then Save.
  13. Then, right click on recreate_executable and select edit with notepad++
  14. Add the new connector sysmex-xn1000-plugin .exe file name and save. (Remark: Analyzer name should be exactly the same with the name inside the excel file)
  15. Then double click on the recreate_executable.
  16. There should have 4 files for instrument
    • .exe
    • .jar
    • .log4j
    • config
  17. Then copy 8 SMC files from Google Drive and paste inside C: > Chemolims > console > bin
  18. Then right-click on sys-services-config.properties and select edit with notepad ++
  19. Add Symex XN-1000 and then save. (Remark: Analyzer name should be exactly the same with the name inside the excel file)
  20. Lastly, double click the recreate_executeble inside  C: > Chemolims > console > bin

Mapping

  1. Open pgAdmin III 
  2. Once open pgAdmin, double click on PostgreSQL 8.4 as below
  3. Then double click on the Databases as below
  4. Then double click on chemolims as below
  5. Then double click on Schemas as below
  6. Then double click on public as below
  7. Then double click on Tables as below
  8. Then find a table name analyzer_masters. Right-click and select View Data > View All Row
  9. Check either the instrument for Mission U500 is already in the table or not.
    1. If Yes, can proceed to the next step.
    2. If No, add all details at the * row and click save.
  10. Then find a table name analyzer_test. Right-click and select View Data > View All Row
  11. Check either the test for Mission U500 is already in the table or not.
    1. If Yes, can proceed to the next step.
    2. If No, Then find a table name test_masters. Right-click and select View Data > View All Row
    3. Scroll down and find the test name from the list and copy the details and paste in the analyzer_test table.
    4. Please make sure to paste at the correct column and the analyzerid column must be similar to the analyzer_masters table.
    5. For analcmdcode and analtestcode column, need to get the details from the machine itself.

Configuration

  1. First go to Menu List > Utility > System
  2. Change the setting to be exactly the same as in the picture.

Test Database

  1. Start ChemoLIMS Server Console
  2. Wait until the Connector Status change to Running.

(Remarks: Update test database)