Each module contains a permission file to configure and identify which role allow to take certain action on page or facility, follow below guide for the configuration steps:
- After boot intellij, double tap “SHIFT” to search for permission.yml file or locate by path: \webapps\webappcore\src\main\java\ci\com\apps\webappcore\[module_name]\assets\config

– module_name represent the module you’re looking for to setup permission.- What if the module was newly added, possible the permission file haven create. To create a new permission file, simply copy an existing permission.yml file, and create the folder path start from [module_name]\assets\config– Once folder created, you can drop the copied permission.yml file into config folder and start editing permission content. - To modify the content, simply open new or existing permission.yml file by using any file editor or IntelliJ, and refer below image for more details:
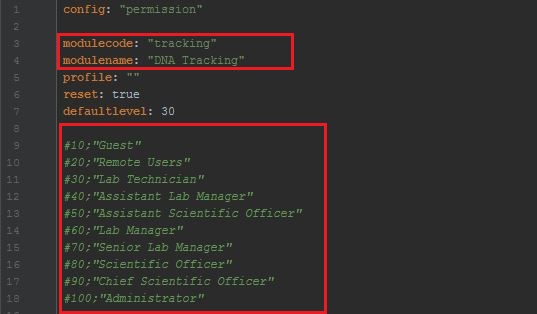
– modulecode is to set which module using this permission, modulecode can refer from gulfile.js when setting xmodule.- modulename is the name of the module.- User role can be trigger based on the list of “green text”, #[number] represent rolelevel from Database table base_approles, but in opposite way, which mean if #20 “Remote Users” in table will be list as rolelevel 90. - After setup the identification of the permission, next will be configure what page allow to take what action. Before we go for the list, you can retrieve the page id and action from JS file, take sample-list.js as example, refer below image:
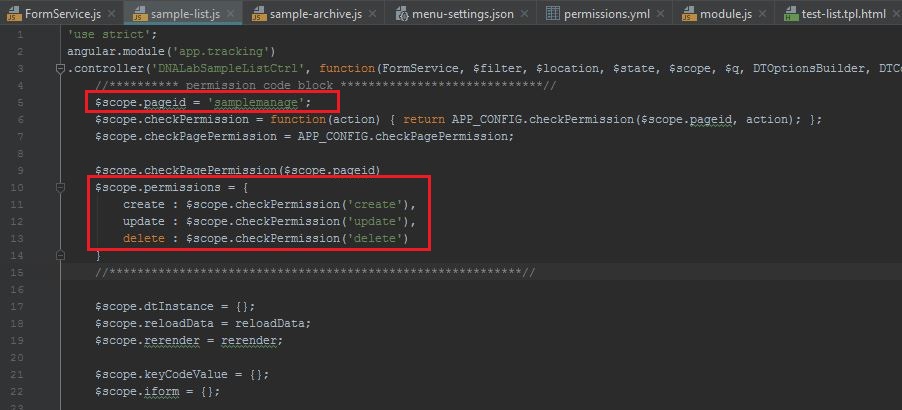
– $scope.pageid is represent the page name to use in permission file- $scope.permissions is represent what action can be taken from the page, default will be create, read (default), update, delete, which equal to #crud in permission.yml.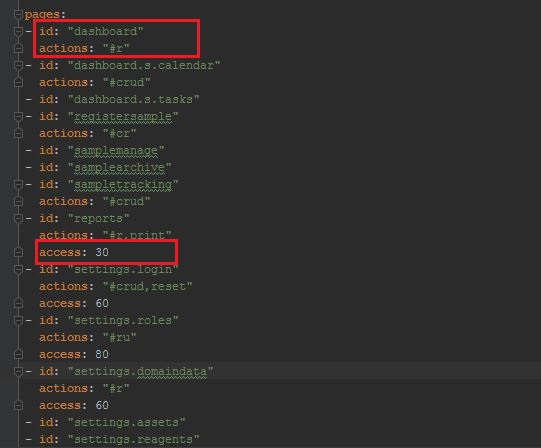 – id represent the page id / name retrieve from JS file
– actions represent the permission control in page
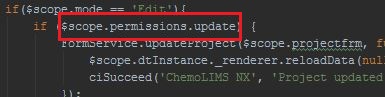
– access represent the role level, level can refer from step 2 - To set permission command / code into DOM, simply refer below example:

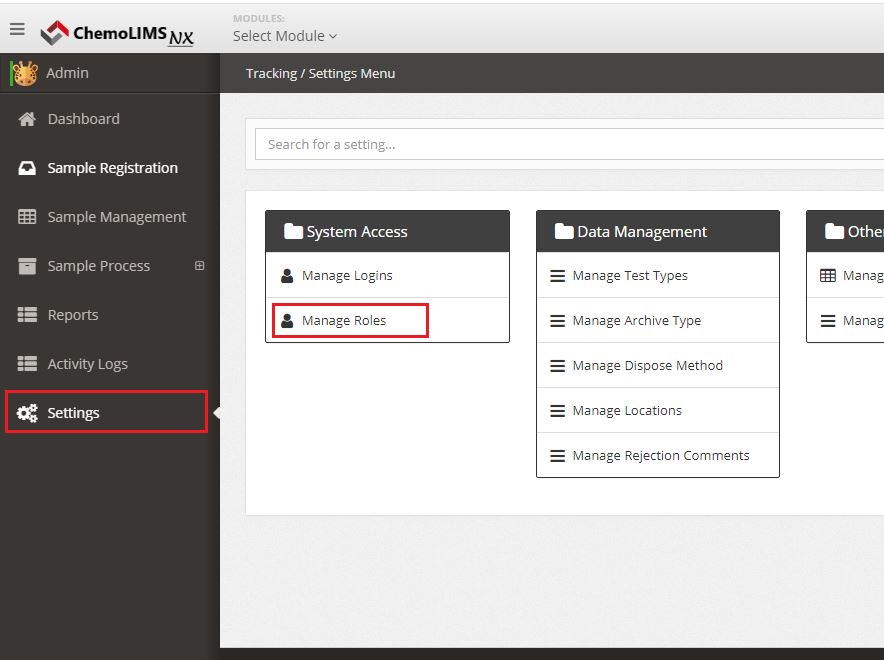
- Now move to UI/UX, login as Administrator account and to completely install permission into the selected module, navigate to Settings > Manage Roles.
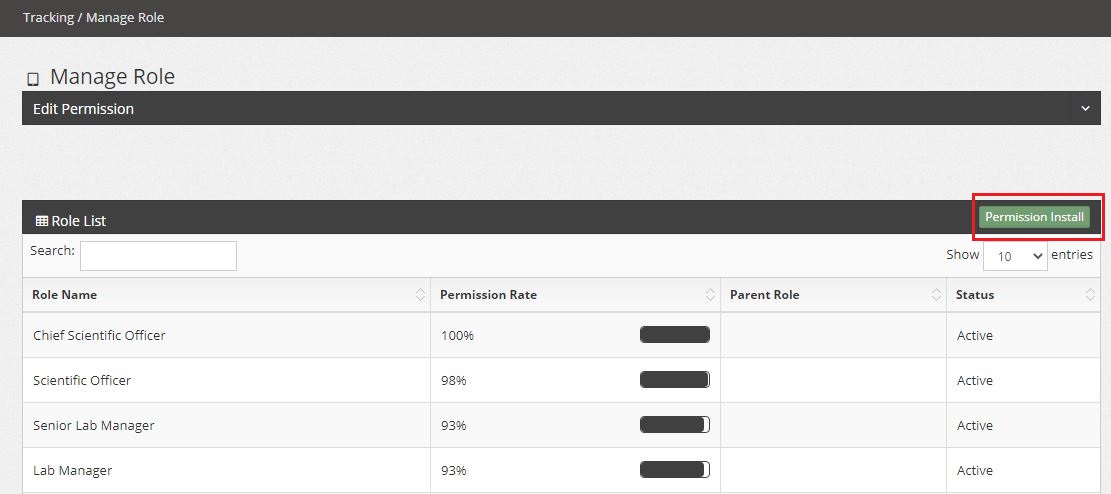
- In Manage Role page, look for the green button “Permission Install” and click on it. A pop should appear to let you insert the permission content copy from permission.yml file.
 After a pop up appear, just insert the permission content into the text box / text field, and click “Install” to save the permission into database. Once install successfully, a “success” message will be show beside the Install button. Refresh the page and the table shall display properly if the permission set correctly.
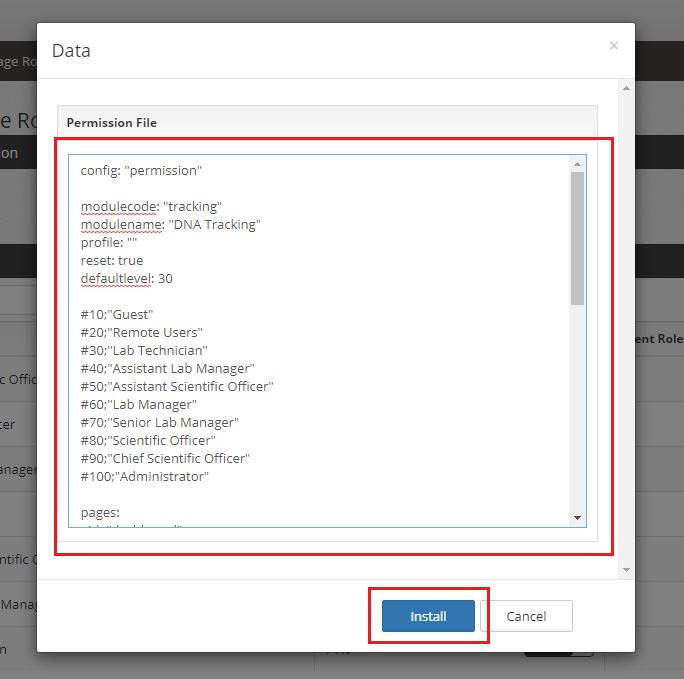
- To trigger the permission for specific role to use under UI/UX, simply click any role row from the table, and a slide down form will display on top of the table.
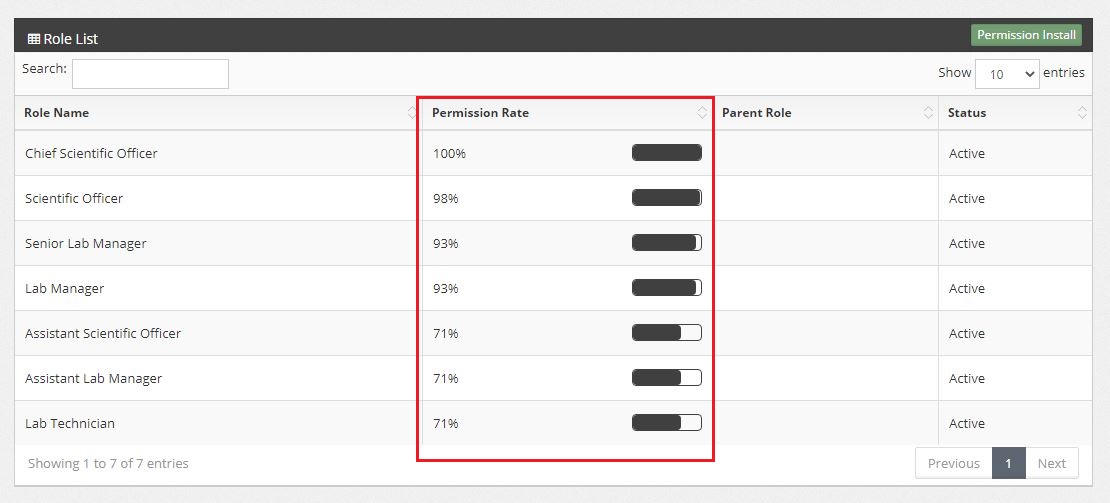 – Permission Role represent how many percent of action can be perform on the role.Below image is the slide down form to setup how many permissions can be perform in a page.
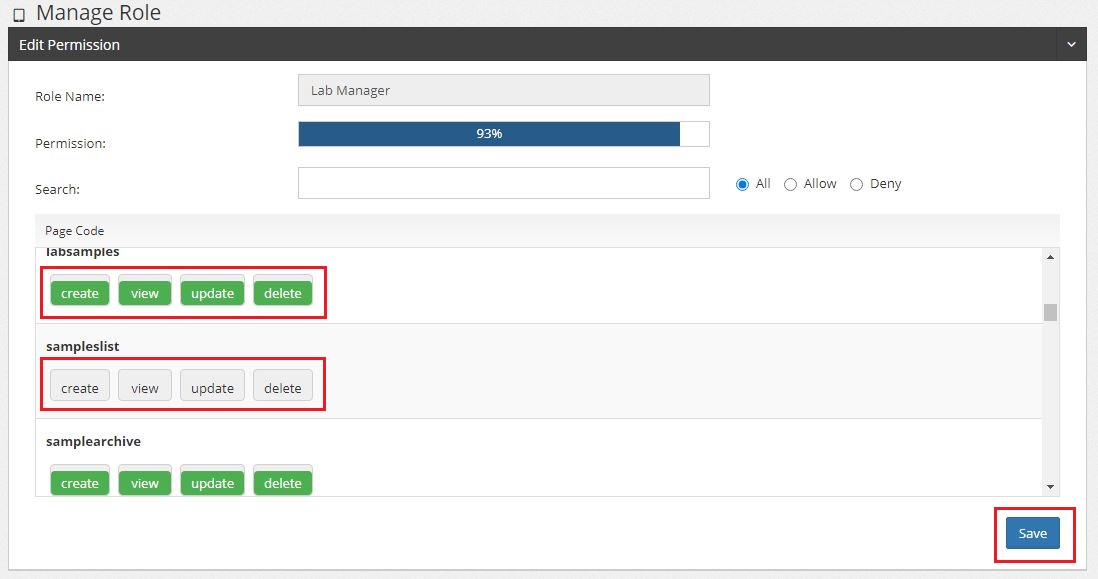 – Click the button one time and change to green color, permission will be Activate and allow the role to take that action.
– Click the button one time and change to grey color, permission will be Deactivate and not allow the role to take that action. - To change the role from user account, login as Administrator or any account have the right to modify login details, and navigate to Settings > Manage Roles.
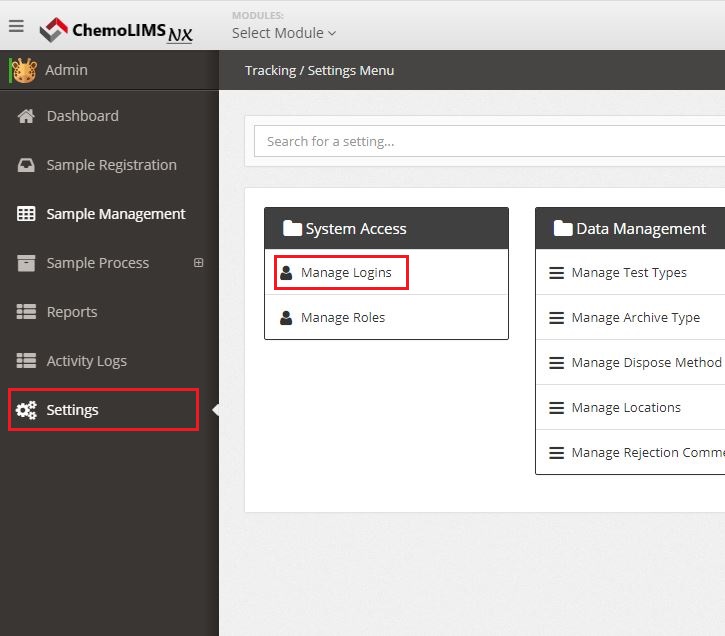
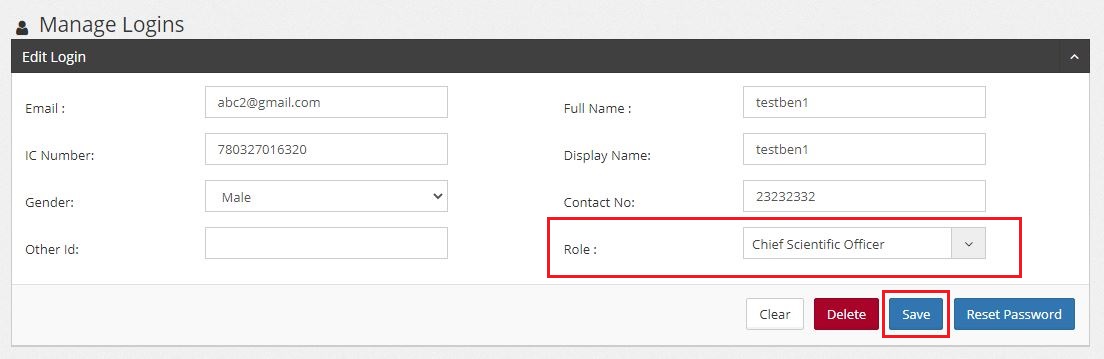
- In Manage Logins page, to add a new login user can click the blue + button, for edit existing user just simply click the row of user and a slide down form will display on top of the table.

- To change the role of user, look for Role on the form, and choose another role from the dropdown / list selection. Once complete the editing, click “Save” button for update.
Total 0 Votes:
0
0