Sysmex XN1000

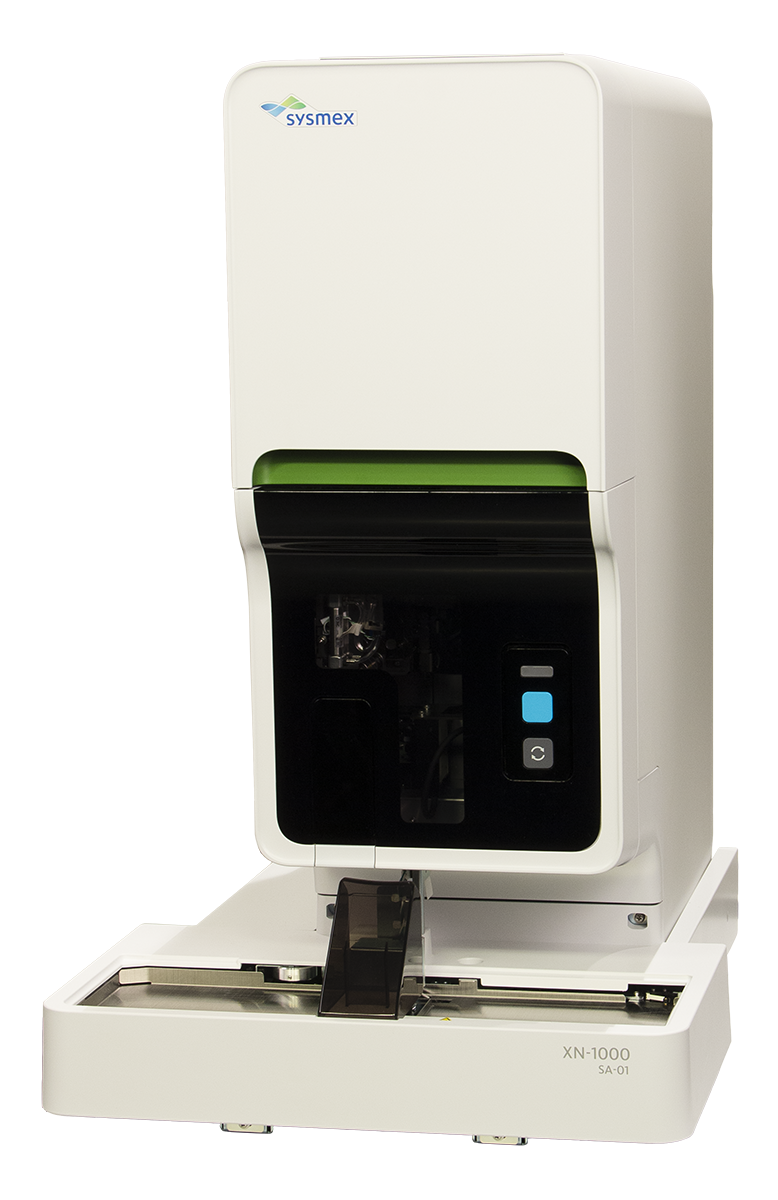
Capable of processing 100 samples per hour. Onboard decision rules and advanced parameters are standard offerings. Includes advanced clinical parameters, including NRBCs with every CBC, Immature Granulocytes with every Diff, RET-He within the Reticulocyte profile and a fluorescent platelet channel for Immature Platelet Fraction (IPF). The series-wide compact design delivers a smaller footprint for increased physical productivity. If bench space is at a premium, a wagon kit providing a floor-standing platform is an available option.
Copy Files
- There are 3 files need to be copied and replace.
- License File
- SMC Files
- Plugin Files
- Firstly, stop all these services.
- Server Console (only when updating sys-services-config.properties file)
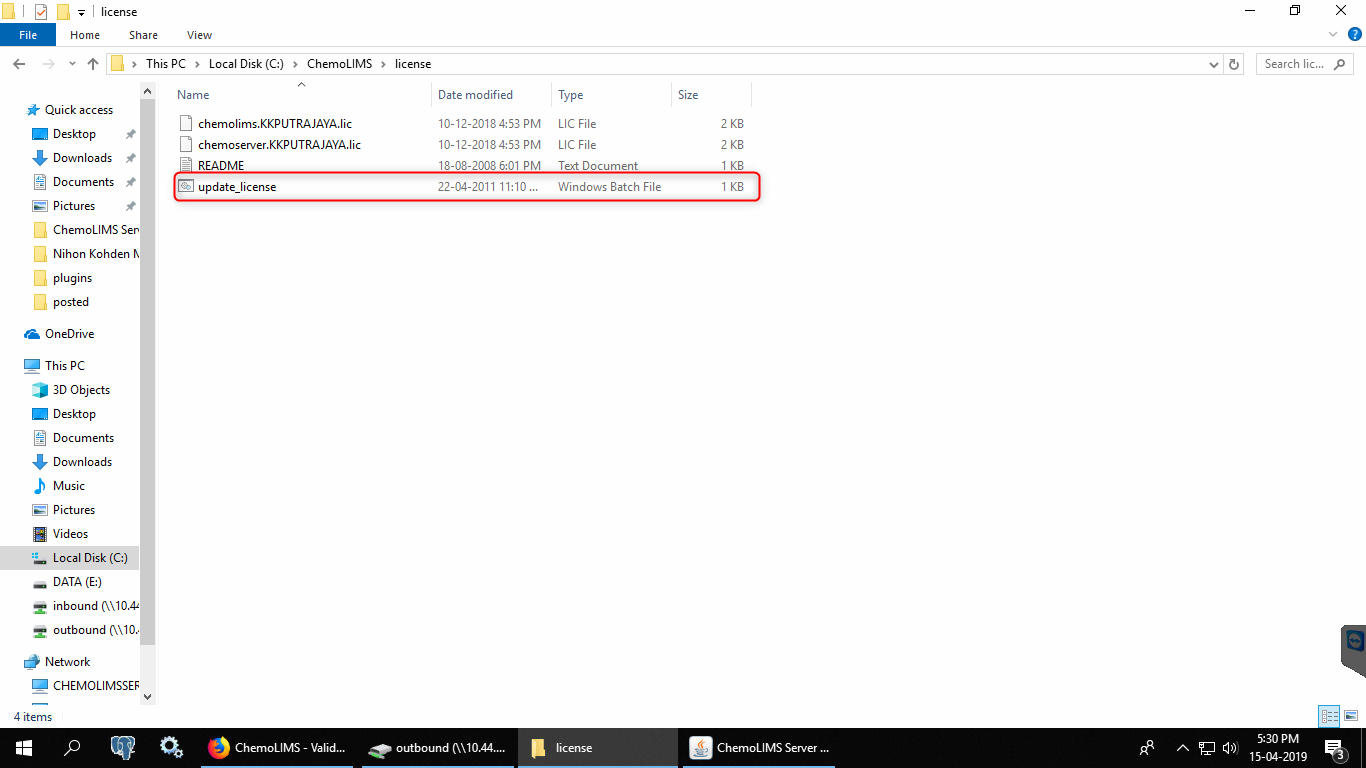
- Paste the created license into 5 different folder
- My Computer > C: > Chemolims > License
- My Computer > C: > Chemolims > server > minimal > license
- My Computer > C: > Chemolims > console > license
- My Computer > C: > Windows > Syswow64 > license
- My Computer > C: > Windows > System32 > license
- Go to My Computer > C: > Chemolims > License and double click on update_license.
- Next, open Chemolims > console > bin > plugins
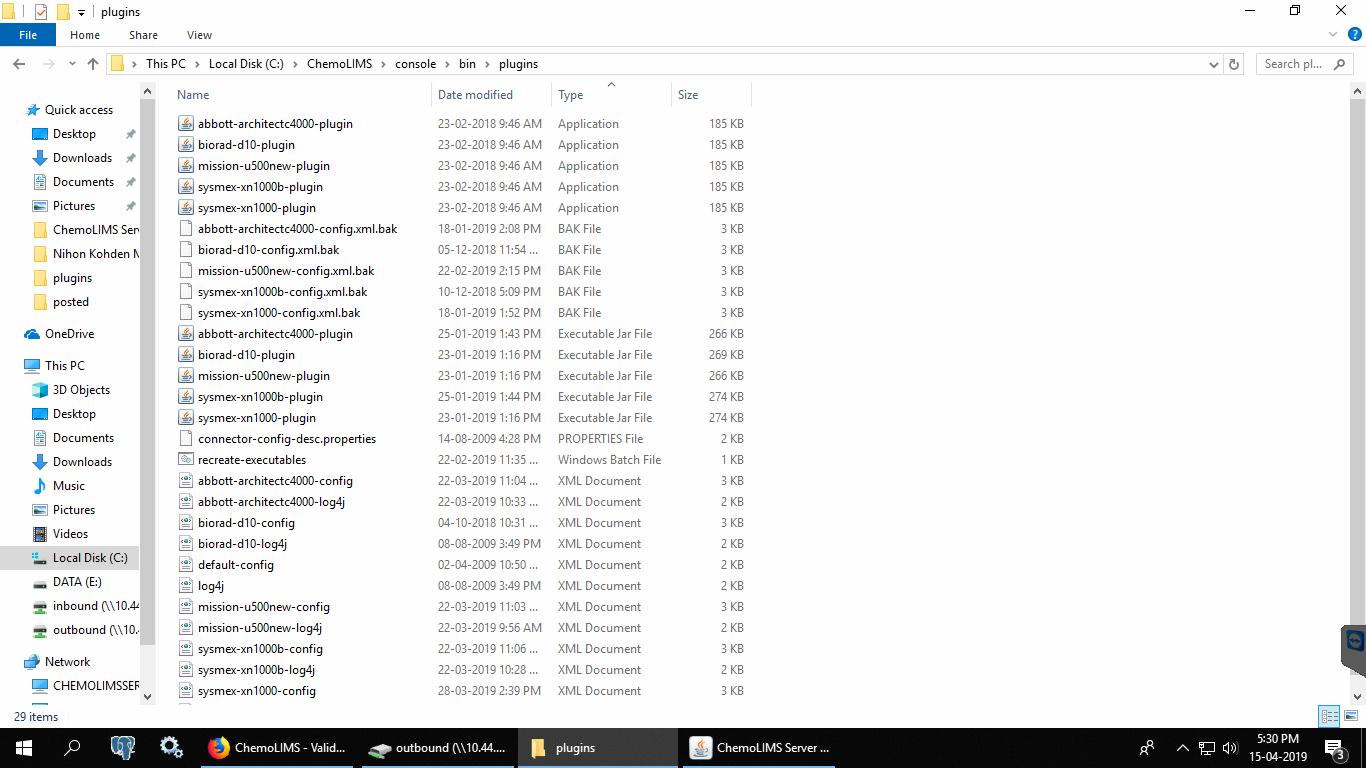
- Replace .jar files for the old connector
- Paste .jar file for the new connector
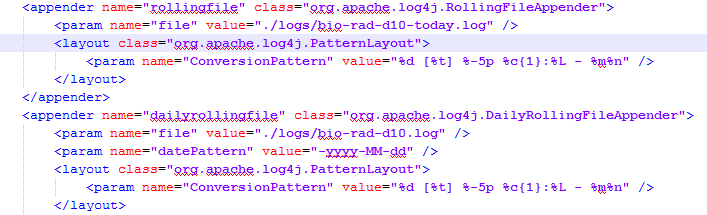
- Copy the existing .config and .log4j files inside C:/ChemoLIMS/console/bin/plugins
- Then, right click on bio-rad-d10-config and select edit with notepad ++.
- Make sure to change from bio-rad-d10 to sysmex-xn1000 and then Save.

- Then, right click on bio-rad-d10-logj4 and select edit with notepad++.
- Make sure to change from bio-rad-d10 to sysmex-xn1000 and then Save.
- Then, right click on recreate_executable and select edit with notepad++
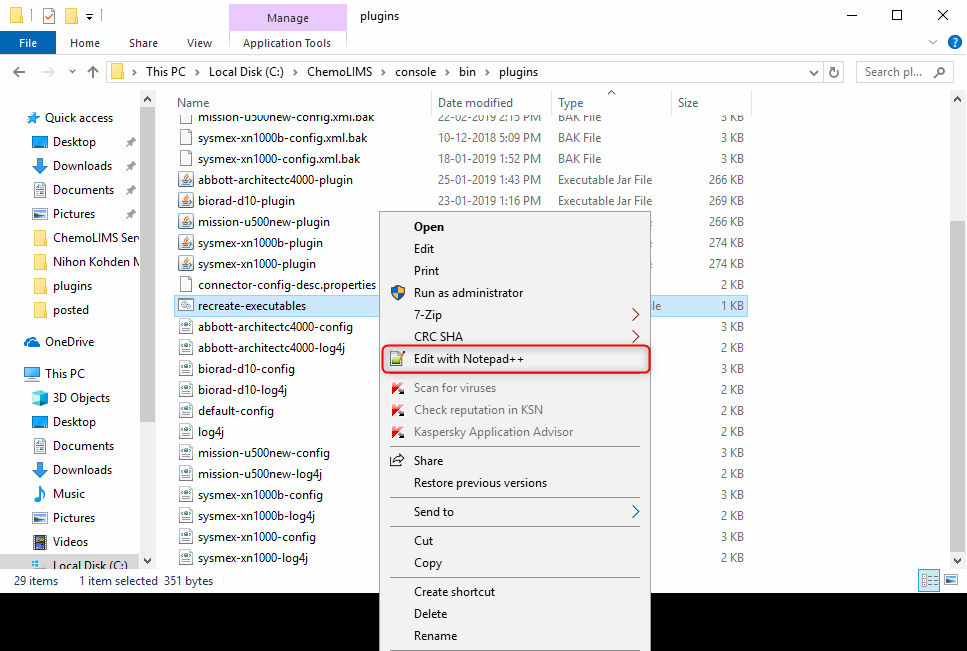
- Add the new connector sysmex-xn1000-plugin .exe file name and save. (Remark: Analyzer name should be exactly the same with the name inside the excel file)
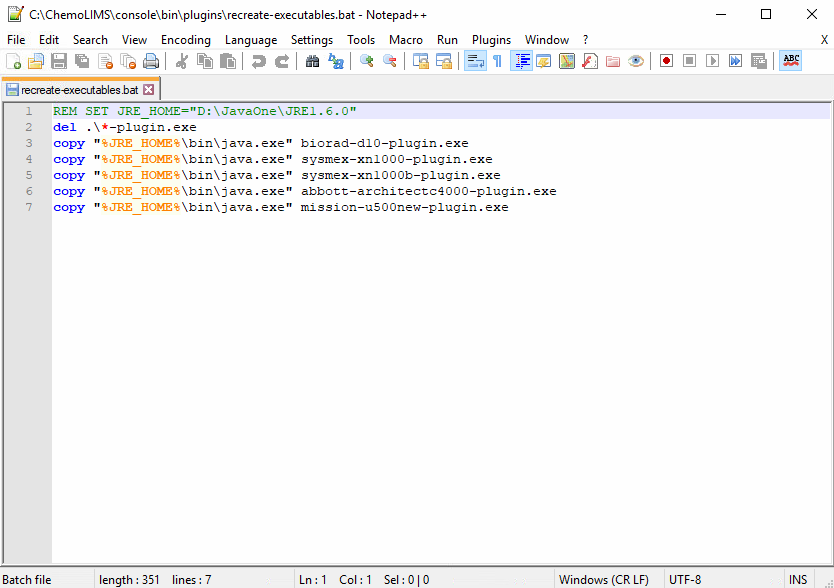
- Then double click on the recreate_executable.
- There should have 4 files for instrument
- .exe
- .jar
- .log4j
- config
- Then copy 8 SMC files from Google Drive and paste inside C: > Chemolims > console > bin
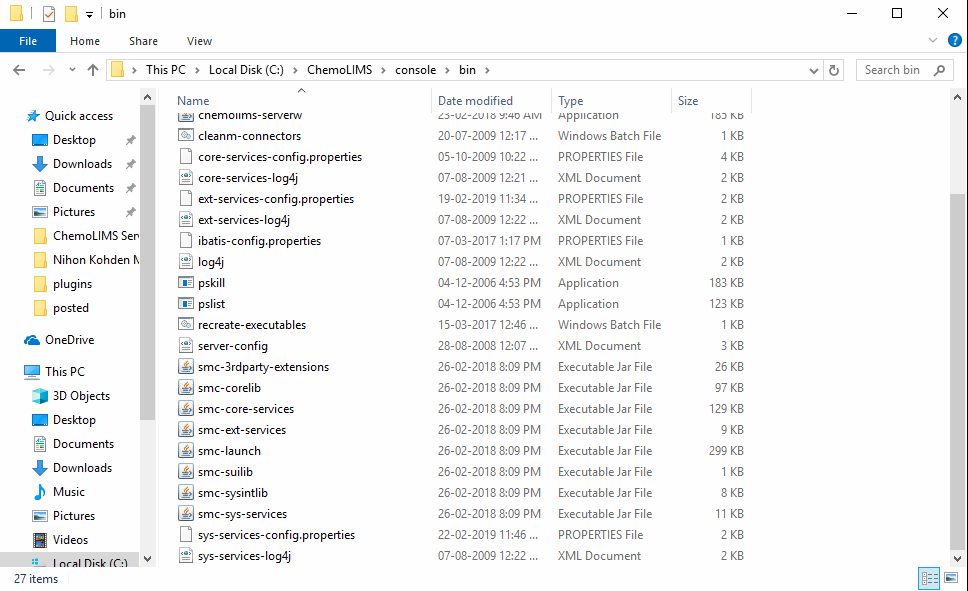
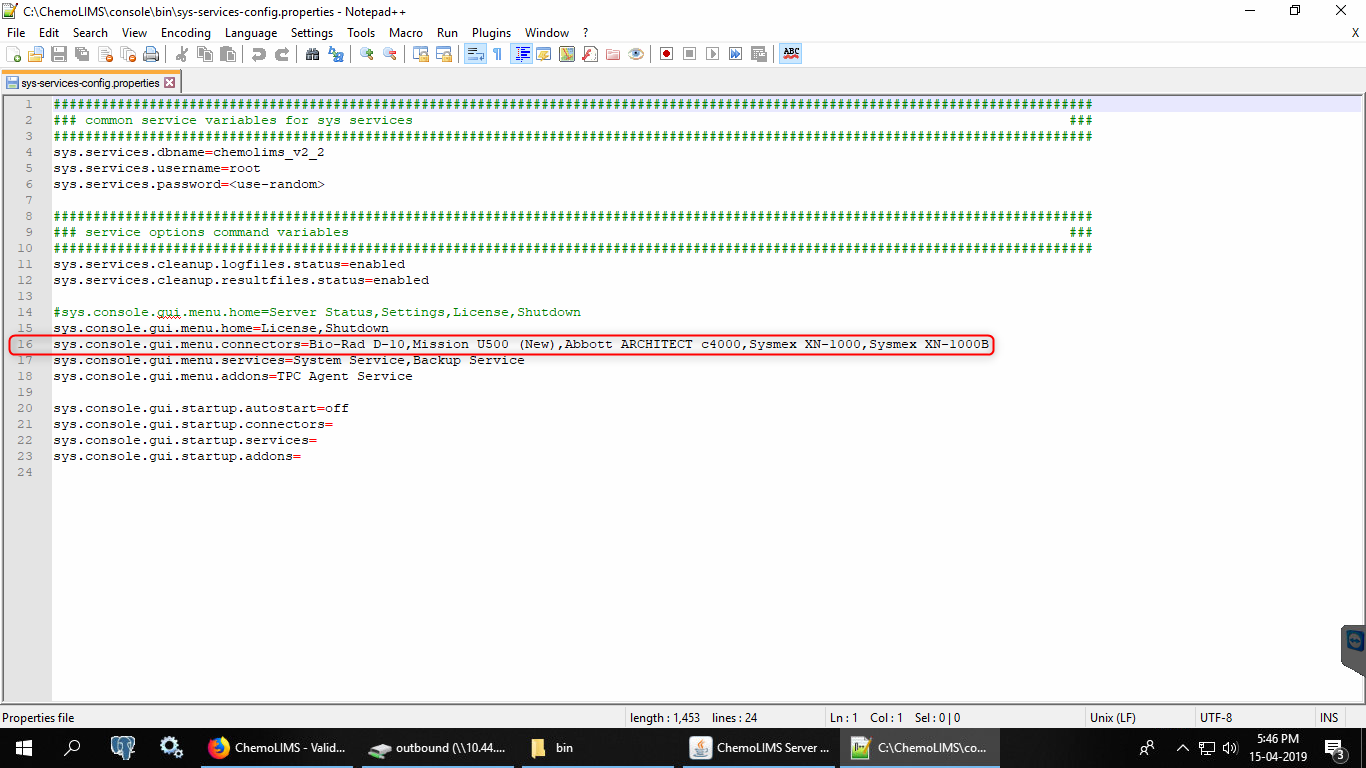
- Then right-click on sys-services-config.properties and select edit with notepad ++
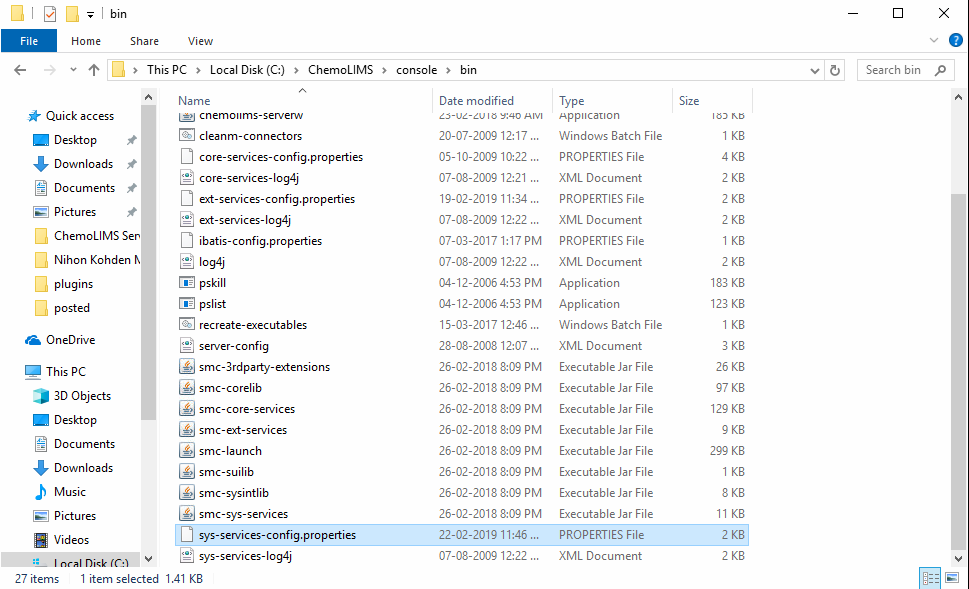
- Add Symex XN-1000 and then save. (Remark: Analyzer name should be exactly the same with the name inside the excel file)
- Lastly, double click the recreate_executeble inside C: > Chemolims > console > bin
Mapping
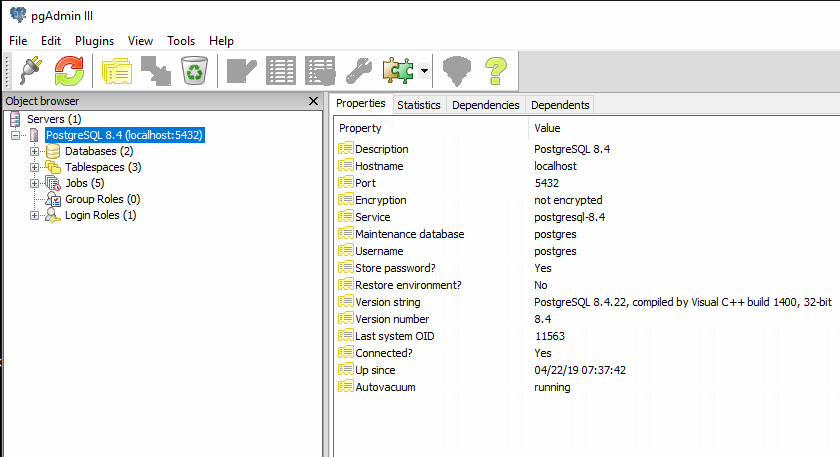
- Open pgAdmin III

- Once open pgAdmin, double click on PostgreSQL 8.4 as below
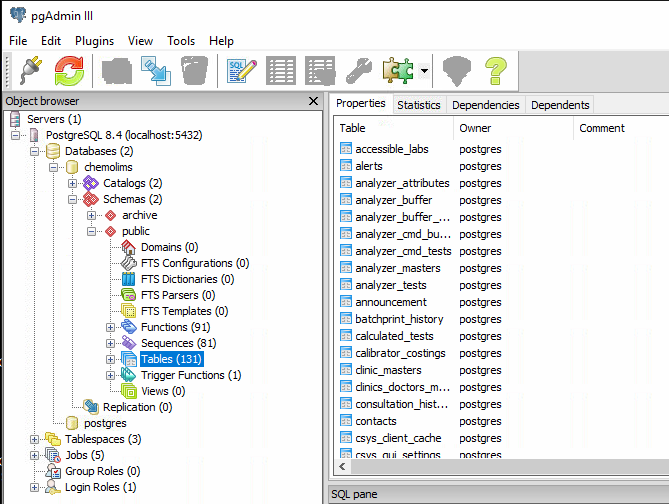
- Then double click on the Databases as below

- Then double click on chemolims as below

- Then double click on Schemas as below

- Then double click on public as below

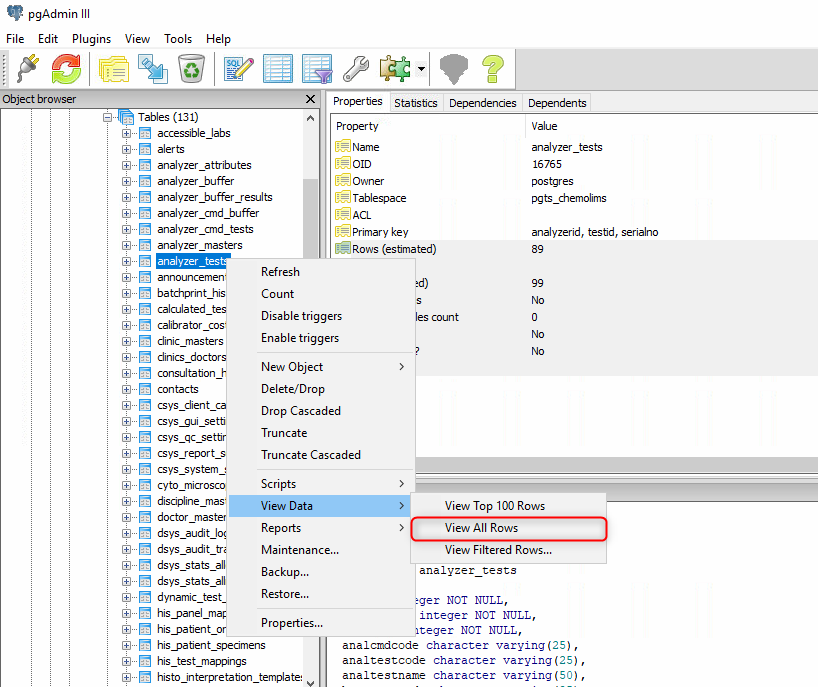
- Then double click on Tables as below
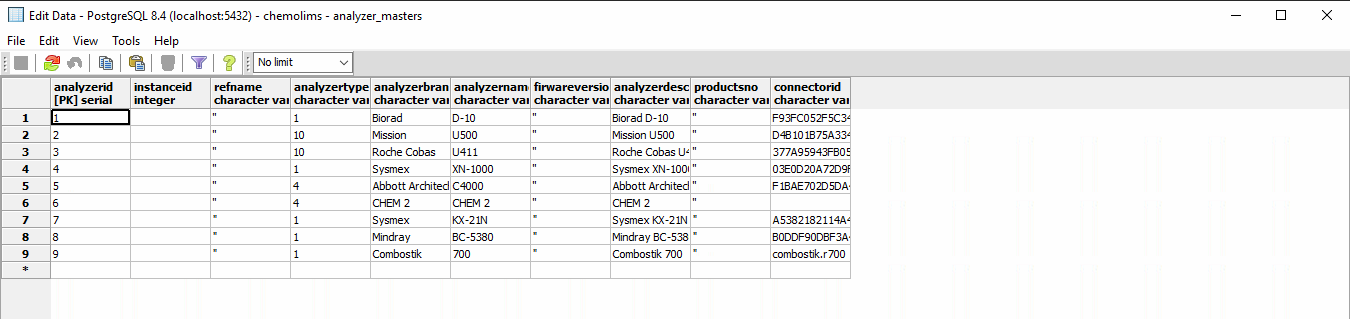
- Then find a table name analyzer_masters. Right-click and select View Data > View All Row

- Check either the instrument for Sysmex XN1000 is already in the table or not.
- If Yes, can proceed to the next step.
- If No, add all details at the * row and click save.
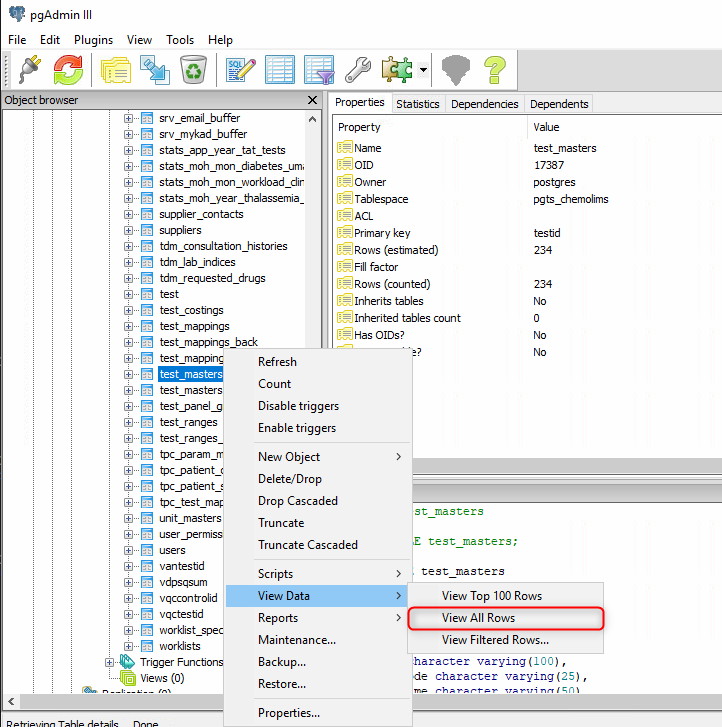
- Then find a table name analyzer_test. Right-click and select View Data > View All Row
- Check either the test for Sysmex XN1000 is already in the table or not.
- If Yes, can proceed to the next step.
- If No, Then find a table name test_masters. Right-click and select View Data > View All Row
- Scroll down and find the test name from the list and copy the details and paste in the analyzer_test table.

- Please make sure to paste at the correct column and the analyzerid column must be similar to the analyzer_masters table.
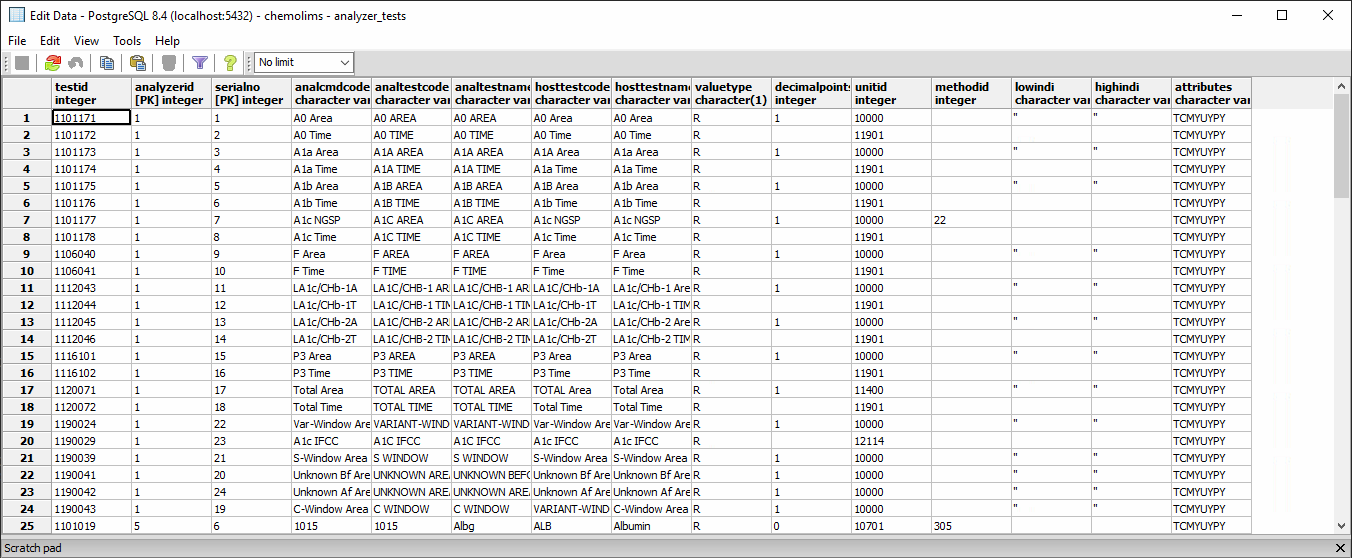
- For analcmdcode and analtestcode column, need to get the details from the machine itself.
Connectivity
- Go to the main menu and select IPU Setting
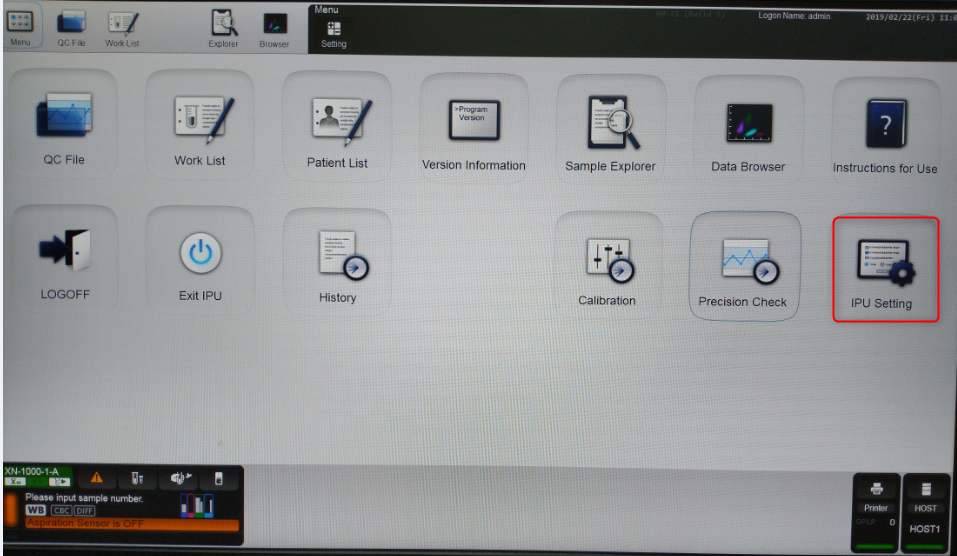
- Then select Host Computer and check the settings to be exactly in the picture below

Test Database
- Start ChemoLIMS Server Console
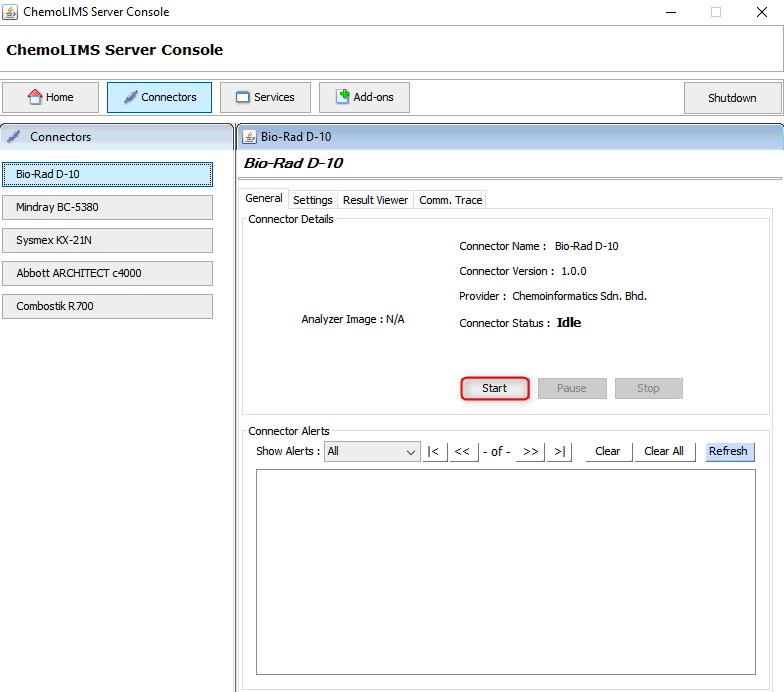
- Wait until the Connector Status change to Running.
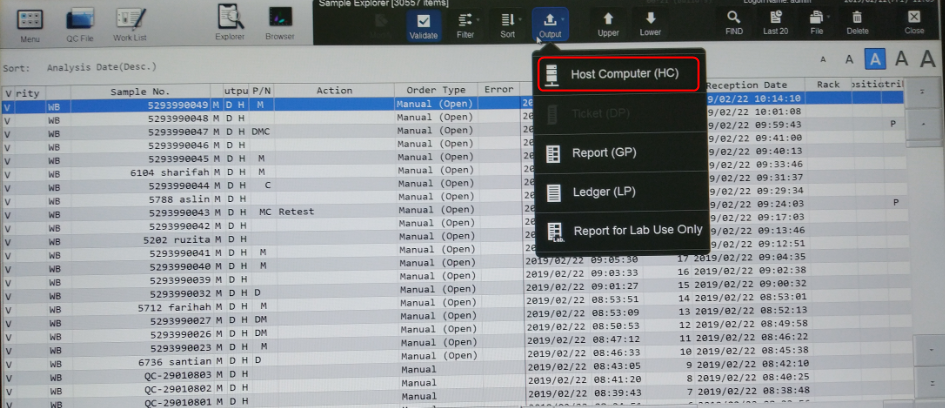
- To transfer the result manually to LIS, highlight one Sample No and select Output and then choose Host Computer (HC).
Total 0 Votes:
0
0